
Raised garden beds are coming in more and more because of their many aesthetic and practical benefits, and are super simple to install – find out more below!
What is a raised garden bed?
A raised garden bed is generally a large planting box that offers good soil drainage, protection from pests and easy access to crops. It not only boosts vegetables above potentially waterlogged grounds but also turns your backyard into the perfect environment for farming your own crops!
Raised beds are easier to keep free of encroaching grass in comparison to ground level beds. Elevated soil warms quickly in spring and drains more easily after a rain. Plus, with better access to your soil, planting, thinning, weeding and harvest become a lot easier in raised garden beds.
As well as these benefits, you get better control of your soil make-up and tailor it intricately for optimal plant growth, making soil well-mixed and compost-rich before placing inside your raised structure.
A raised garden bed is not only an efficient farming solution, it is also a lovely garden feature. The edges can be of any durable building material, including rock, brick, and concrete and interlocking blocks. Watering troughs or claw-foot tubs will also work as long as they have the capacity and drainage.
Want to grow fresh veggies and flowers but worried about the limited space? A raised garden bed is a perfect solution. Here’s a step by step guide explaining how to make one.
Step 1: Choose the right location
Choosing the right location to build the raised garden bed depends on the type of plants you want to grow and how much sun, shade and wind they will need, so research this first. If you will be growing delicate flowers, shrubs or small trees that cannot take much exposure to wind, consider a part of your garden that is more sheltered, since raising their soil level can make them more exposed to the elements.
Step 2: Prepare your Location
Place the frame in position and mark the outline with a shovel. Putting the bed on soft ground instead of a tough surface — like concrete — permits correct root growth and good drainage.
Set the frame aside to pull up any plants or grass, and loosen the dirt to help new plants grow deeply into the earth. Before setting the bed, staple wide-mesh to the bottom of the frame to help prevent weeds.
Pro Tip: Professional gardeners and landscapers like ourselves like to dig down 2 spades deep and mix the soil layers together with fresh soil and compost to get a loose and rich soil foundation.
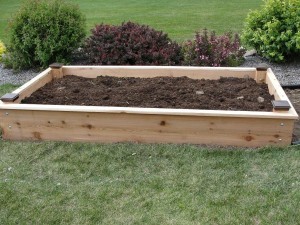
Step 3: Building the Garden Bed
In the previous step, you should have decided how big you want it to be and marking out you outline, but next you must acquire the materials to suit the height and size you need. The size of the bed should be at least 6 inches high to provide easy accessibility and gives roots plenty of space to grow.
For 4-foot by 6-foot bed with 2X4 untreated lumber, mark the lengths on the wall and cut the boards accordingly. You can even cut posts for easy installation along the walls which give additional strength to the bed.
Depending on the length of your support posts, drill two to three holes in them and connect all sides with screws to form a box. The posts should be on the inside of the bed.
Step 4: Adding Soil and Plants
Fill the bed with a mixture of compost and nutrient-rich soil. Set the plants gently and fill and keep the soil loose around plants so that water can easily reach the roots.
Step 5: Watering
Try to water the plants in the morning when less water evaporates from the sun. Keeping your raised garden bed is more important versus other types of gardening since they tend to dry out more quickly because of the effective drainage.
Step 6: Raised Garden Bed Options
Consider adding a mesh cover with wooden frames and PVC pipes to keep birds and insects away.
Enjoy your raised garden bed! If this article has inspired you to craft your own raised garden bed, let us know how you get on – we’d love to hear about and see some of your projects!